
Now that we have our account with the freebies! (If not please have a look at LINK) I was wanting to create a new virtual test machine, what follows is a perilous journey into the unknown!.
Step 1: Getting there.
Navigate to the following link:
Viola! you should now see the following:
Step 2: My First VM
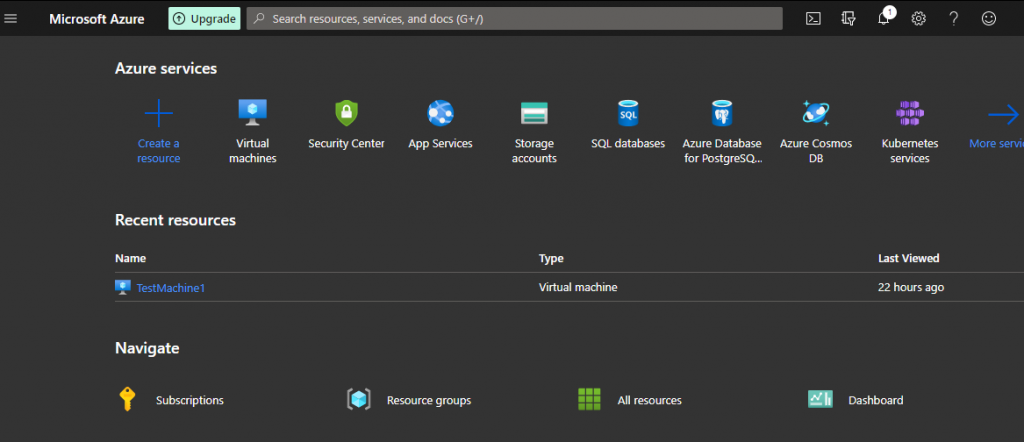
Great! Now you are at the Azure portal. Let’s create a test machine, keep in mind the specifics of the one I demonstrate are optional, configure how you like.
Now go ahead and click the Virtual Machines icon, this should direct you to the virtual machines blade on the Azure portal. Something like this:
Perfect, where we are now is probably one of the coolest things I have seen in a while (not since my first experiences with Openstack, but I digress!).
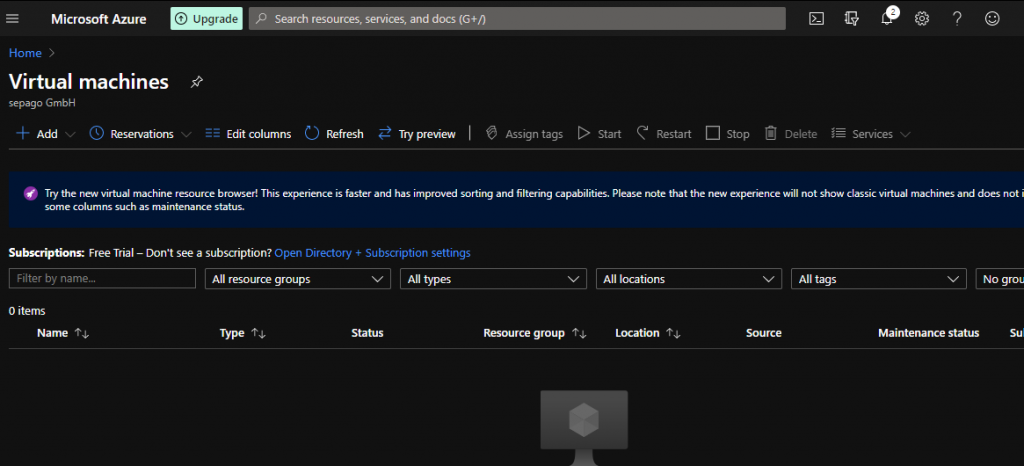
Now click on the huge “+ Add” sign and further select “Virtual machine”, something like this:
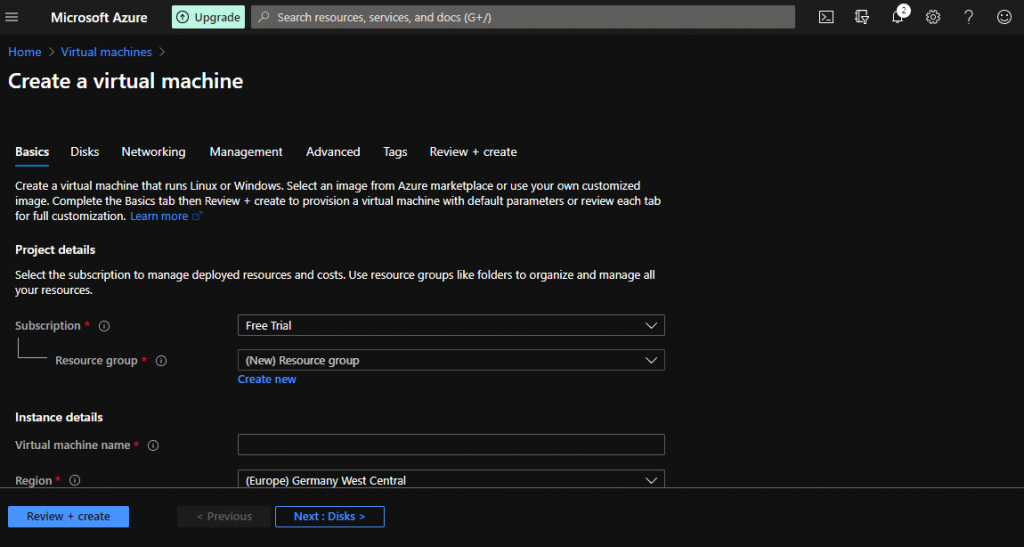
Now on this window we go ahead set a Virtual machine name also here, you can set the specifics of your own VM. For my purposes I did the following:
| Attribute | Value | Comments |
| Subscription | Free Trial | I have been using the freebies! |
| Resource Group | Resource group | This is my test group, I created it by following the create new link. |
| Virtual machine name | Test-machine-01 | This is my choice, feel free to enter any name keeping in mind the naming conventions (only numbers, alphabets, ‘.’ and ‘-‘) |
| Region | Germany West Central | Again, please feel free to set your own. |
| Availability options | None | To be honest, this is a first test machine so I left this experiment for later! |
| Image | CentOS-based 8.2 – Gen1 | I need my CentOS machine, but again feel free to experiment. |
| Azure Spot instance | No | I do not know what this means, left it for later! Remember, I stick to defaults like a dummy! |
| Size | Standard_D2s_v3 – 2vcpus, 6GiB memory | Now here I got stumped because it charges you a per month cost, but I guess for now it goes out of my starting credits, so no matter! |
| Authentication Type | Password | Keeps it easy. |
| Username | (Pick your own!) | Self explanatory! |
| Password | (Pick your own!) | Self explanatory! But keep in mind: The value must not be empty. Password must have 3 of the following: 1 lower case character, 1 upper case character, 1 number, and 1 special character. The value must be between 12 and 72 characters long. |
| Public inbound ports | Allow selected ports | I wanted to be able to ssh in. |
| Select inbound ports | SSH(22) | Like I said! I wanted to be able to ssh in. |
Now proceed by clicking the “Next: Disks” button you should now see the following:
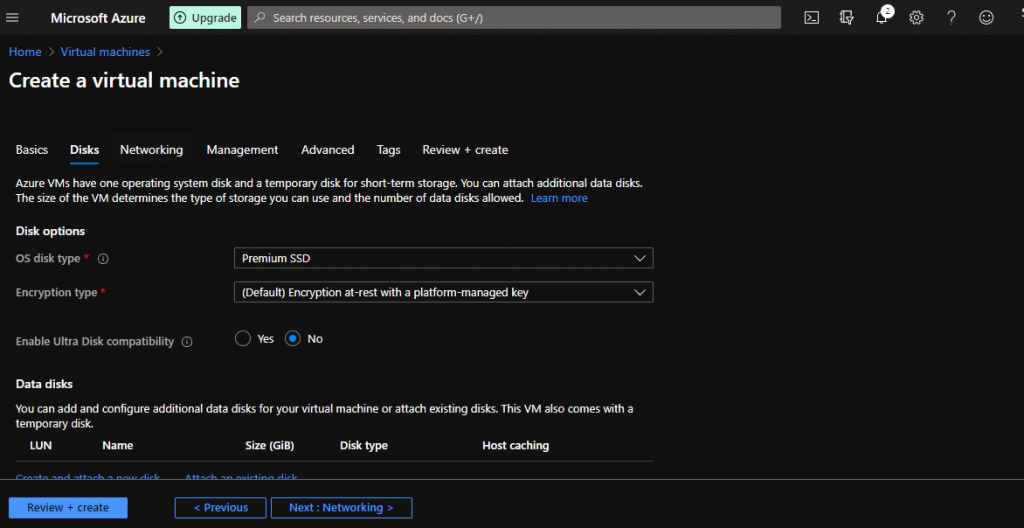
Now that we have the basics set, we now move to the disks. From what I understand here we can assign disks to our VM. Ok before we proceed a short clarification, under the OS disk type option I selected Premium SSD but I panicked as “Premium” to me means pay for something! But don’t bother as long as you are not out of the freeby credits, you are fine!. Also when you do run out you can use the Pay-As-You-Go option under billing but again, will cross that bridge when I get to it!. Following are my settings for the Disks sub option.
| Attribute | Value | Comments |
| OS disk type | Premium SSD | Again, do not fret we have the freeby credits! |
| Encryption type | Default | I left this for a later experiment, lot’s to learn you see! |
| Enable Ultra Disk compatibility | No | Again, on the TO-DO! |
| Data disks | TestMachine1_OS | I have already created a disk, however if you are starting out click on “Create and attach a new disk” |
Great! we now have a disk attached to the test machine. Now click on the “Next: Networking” button. It should take you to something like this:

To be honest, this tab requires a whole lot more explanation (TO-DO!). But to follow are the settings I have set:
| Attribute | Value | Comments |
| Virtual network | Test-machine-01_group-vnet | I have on made but if you haven’t (which I highly suspect most of you haven’t, I haven’t spoken of it yet!!) you can follow the “create new” but again I stuck to defaults! |
| Subnet | Default | TO-DO |
| Public IP | Default | TO-DO |
| NIC network security group | Basic | Defaults! |
| Public inbound ports | Allow selected ports | I needed to be able to ssh in. |
| Select inbound ports | SSH(22) | Again, ssh! |
| Accelerated networking | Off | Defaults! |
| Load Balancing | No | Defaults! |
Now we click the “Next: Management” button, you should now be through to the Management blade, like so:
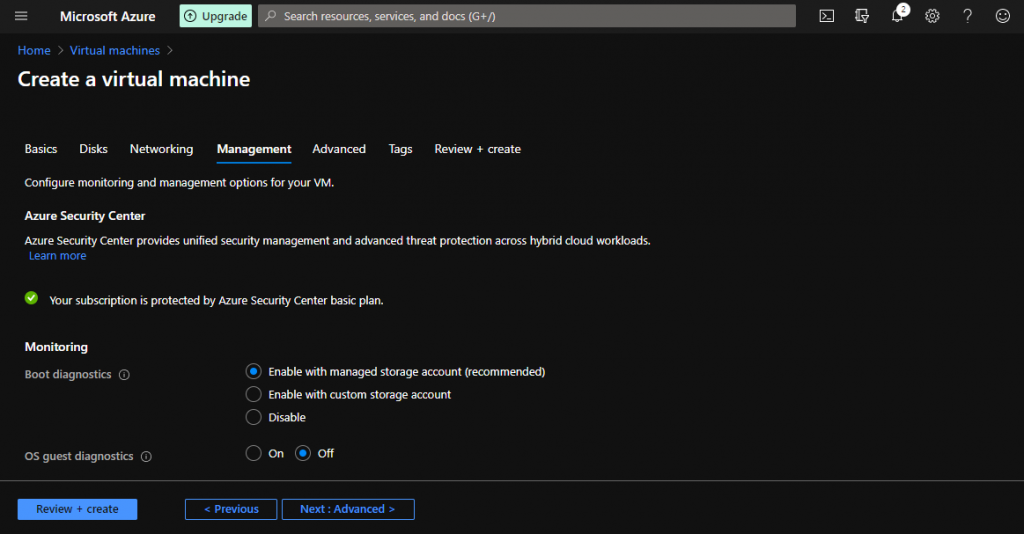
Here I entered nothing and instead rely-ed on Defaults, remember when starting out Microsoft makes it easy and allows you to successfully use its services.
Now, clicking through to “Next: Advanced” then “Next: Tags” then “Next: Review + create“. STOP, now here you have to click on “Create” (At the bottom left!, if you couldn’t find it like me).
Success, after all those clicks we have now submitted a request Azure to deploy the resources per our specification. Now you should be looking at the Deployment summary which at this point should be showing a cool animation saying deployment in progress ! (See animations keep people like me interested :P). Okay so by the time I got to writing this my deployment was already successful and I saw this:
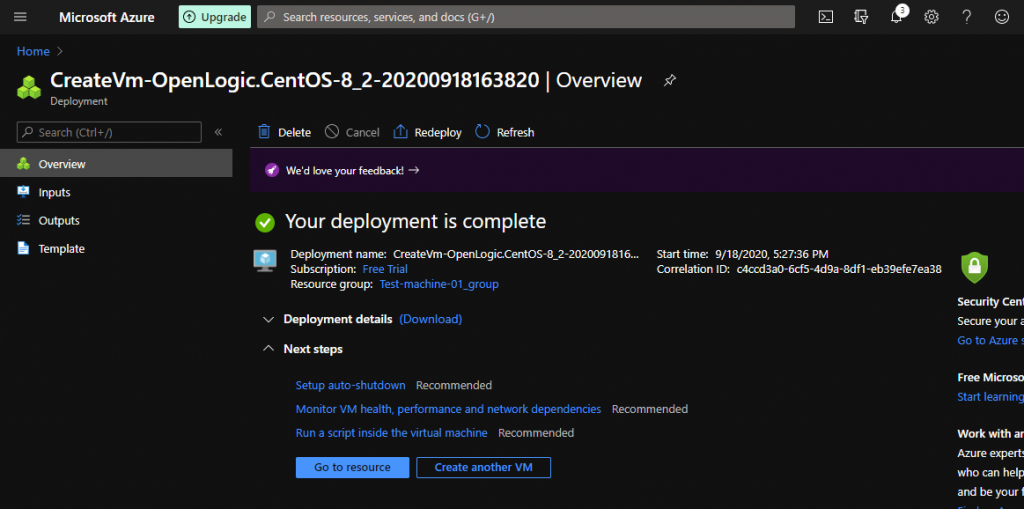
Now do nothing….
I want to get you in to the machine yet! So after your deployment is successful. Navigate back to the “Home “ look at the top right of the window. So now i’m hoping you find the link ok… Let’s click it. You should now see this:
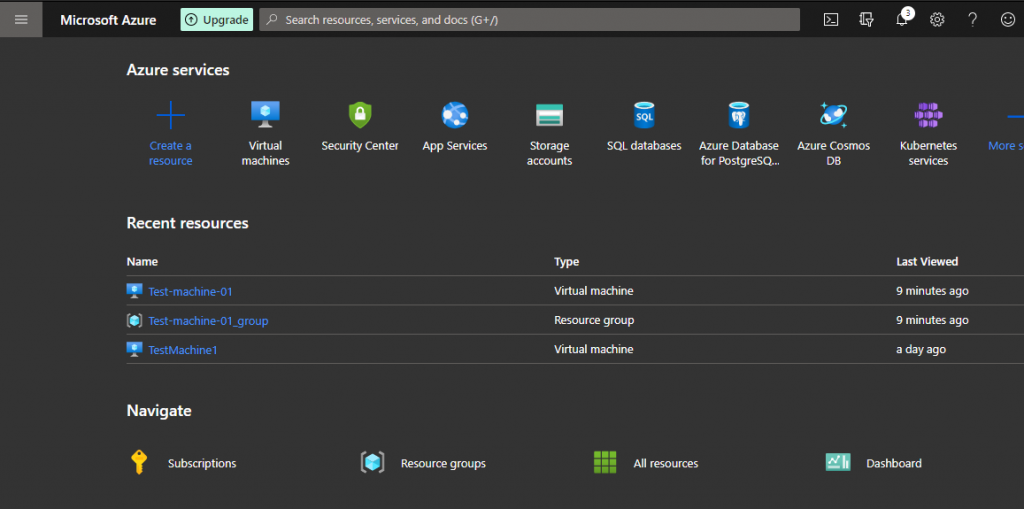
Now go ahead and click on your Resource which is now successfully deployed “Test-machine-01” in my case (This is the virtual machine name you set!), look for it under Recent resources. Go ahead and click on it (everything here is clickable so super easy and approachable). You should now see something like:
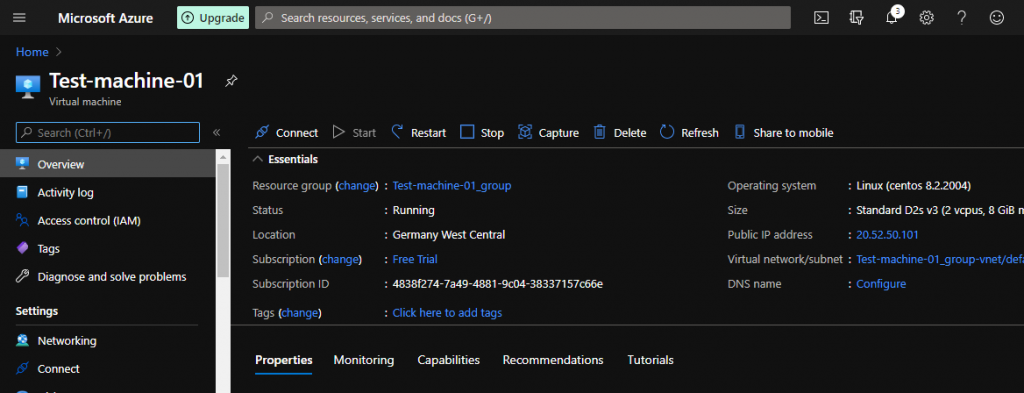
Now go ahead and click on “Connect” under the sub menus (Look at the toolbar on the left!). Now you should see the following:
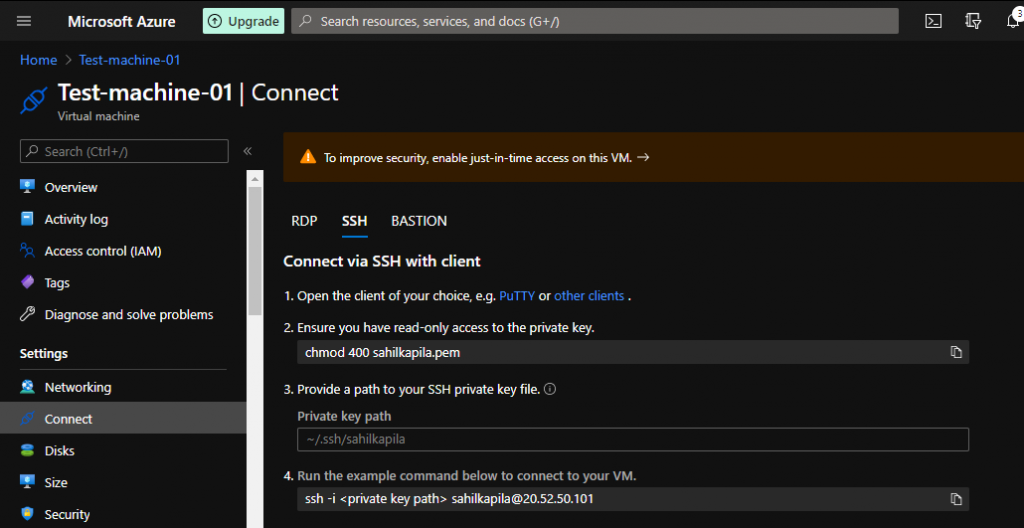
As long as you have SSH selected you should be able to see the IP address and username.
Step 3: SSH
Now you have all you need to SSH in. A quick tool-tip, I recently got referred to mRemoteNG by a colleague (Shoutout!). You can download this here:
https://mremoteng.org/download
Moving further I will talk through getting into your Resource via SSH on mRemoteNG, so it would help if we keep our tools synced (In case you or I need help!).
Ok, so now open mRemoteNG, and lets create our connection. If you look at the connections tab (Look at the left corner of your window!) you should be able to see an icon to create new connection ( for those savvy enough, scroll down a bit!), for this how-to though I will talk you through the “Other” way!
Go ahead and click on “File” on the top toolbar. You should now see a dialog box fall under as follows:

Go ahead and select “New Connection” . You should now see a connection file appear in the “Connections” toolbar, like so:
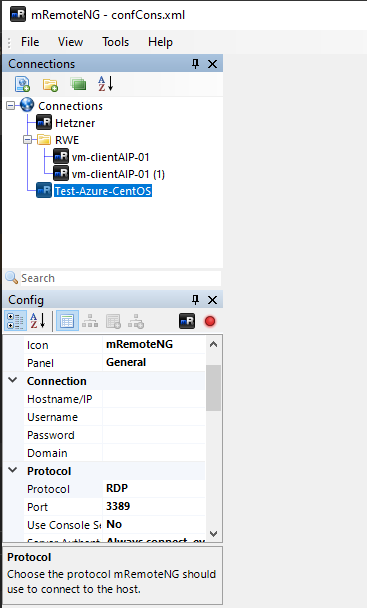
Now go ahead and set the following details:
| Attribute | Value | Comments |
| Hostname/IP | (your own IP here) | This value you should have seen off the Azure virtual machine “Connect” sub menu |
| Username | (your own username here) | This value you get off the same “Connect” sub menu |
| Password | (your own password here) | This value was set during VM creation when we created an account on the machine. |
| Protocol | SSH version 2 | Remember, we want to SSH in! |
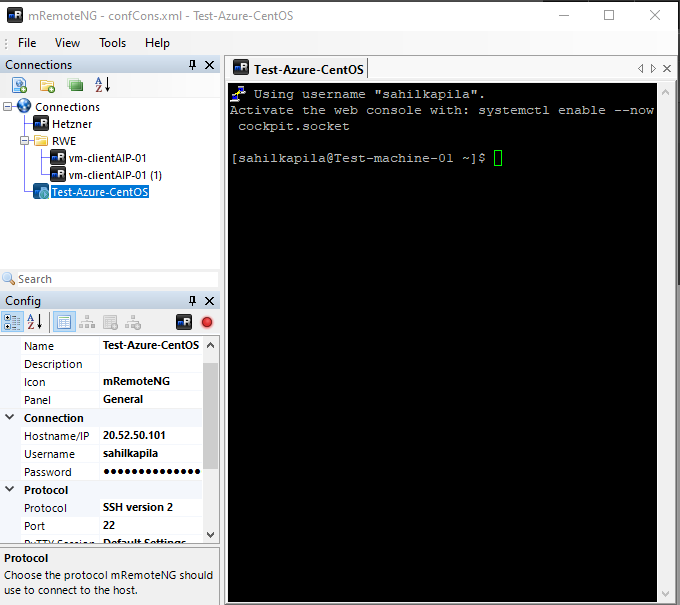
Now go ahead and double-click on the connection, it should successfully connect as follows:
Step 3: Now what!?
Great, now you have successfully connected to the create Resource, your VM. There is a lot more for me to learn, ALOT of TO-DO’s. Will definitely create more content as I go along.
Hmm. Too techie for me. 🙂